
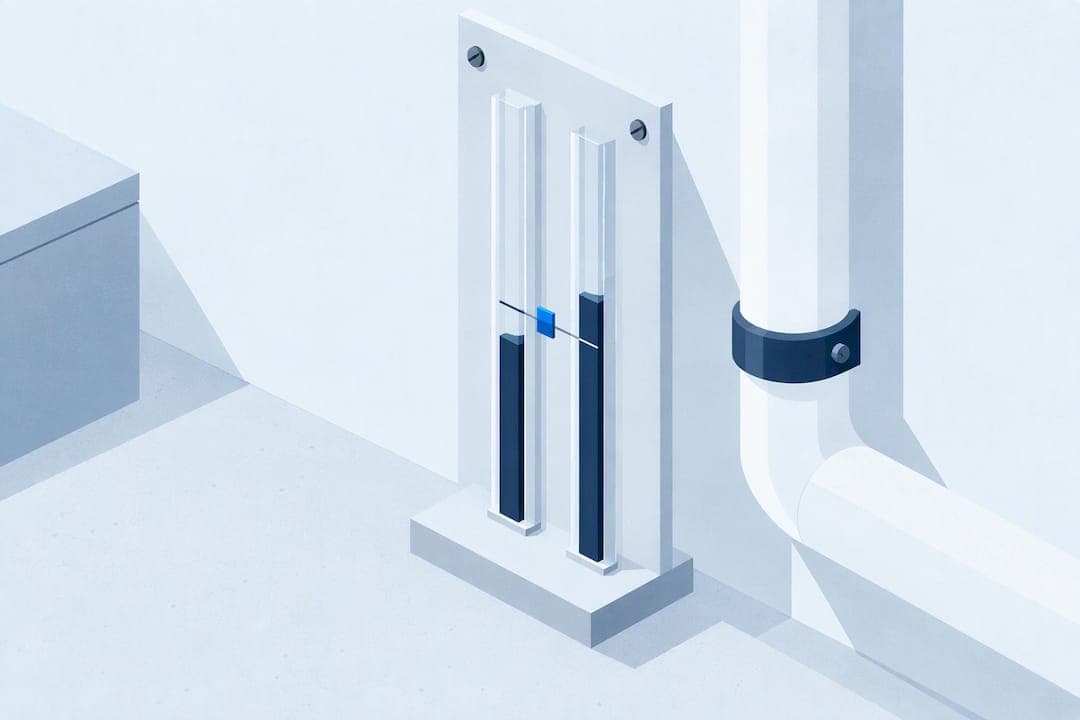
If the vinyl tube is connected and the two legs of the U-tube are at different heights, the fan is running; if the fluid rests level at zero with the fan off, the gauge is correctly zeroed. If the gauge reads zero while the fan is running, do not assume everything is fine. Reconnect the tube, check the zero setting, and work through the troubleshooting steps before calling a professional.
TL;DR:
- Turn off the fan, disconnect the tube, and align the marker with the level fluid; reconnect, restart, then wait a few minutes before reading.
- Typical residential readings fall around 0.5 to 1.75 inches of water column, but systems vary; only an indoor test confirms radon levels.
- Compare readings with the installer’s labeled startup baseline and track them monthly; drift, especially a rise, can point to blockage, ice, or fan strain.
- Reseat loose tubing and replace cracked tubing or cloudy fluid; call a professional for a broken fitting or a reading that remains abnormal.
Table of Contents
- How to read a U-tube manometer and convert it to inches of water column
- How to safely reset or re-zero your manometer without damaging the system
- What normal manometer readings look like and safe operating limits
- Troubleshooting checklist: tube, fluid, and mounting problems
- Mounting and maintenance that keep readings accurate
- When to call a radon professional for service or verification
- Why routine manometer checks matter for long-term radon control
- Getting professional support for testing, verification, or repair
- FAQ
- Sources
How to read a U-tube manometer and convert it to inches of water column
A radon system manometer has four parts you need to recognize: the U-shaped tube holding colored fluid, a printed scale behind it, a sliding zero marker, and a vinyl tube connecting the gauge to the radon vent pipe. Each piece matters. The scale reads in inches of water column (i.w.c.), a unit that measures the small vacuum the fan pulls on the piping, not radon concentration itself.
The fluid moves because the fan creates negative pressure inside the vent pipe. That pressure pulls fluid up on one side of the U and pushes it down on the other. The difference in height between the two legs, read against the scale, is your pressure reading. A bigger gap means stronger suction; a flat, level fluid line with the fan running usually means something is wrong.
Here is the sequence practitioners recommend for an accurate reading:
- Confirm the vinyl tube is firmly seated on the barbed fitting with no kinks or splits.
- With the fan running, observe whether the fluid levels differ between the two legs.
- If the zero marker does not align with a level fluid reading taken while the gauge was open to room air, reposition it before trusting the number.
- Read the scale at the point where the fluid settles on the radon-pipe side, holding your eye level with the fluid surface to avoid parallax error.
The most common mistake homeowners make is setting the zero mark while the fan is still connected and running. That builds the fan's vacuum into your "zero," which then makes every later reading look artificially low. Energy Vanguard's guidance is clear on this: zero the gauge with the fan off and the tube disconnected so both legs are open to the same room air. Skip that step and your readings will not reflect the system's actual performance, even if the fan is working perfectly.
How to safely reset or re-zero your manometer without damaging the system
Re-zeroing a manometer is a five-minute task, but the order of operations matters. Rushing it, or skipping the power-down step, is what leads to a false reading that sends you chasing a problem that does not exist, or ignoring one that does.
- Switch off the radon fan at its dedicated switch or breaker before touching the gauge.
- Gently remove the vinyl tube from the gauge so both legs of the U-tube are open to the same room air.
- Slide the zero marker until it lines up exactly with the resting fluid level on the scale.
- Reconnect the vinyl tube to the fitting, making sure it seats fully without forcing or stretching it.
- Restart the fan and let the system run a few minutes before taking a new reading.
Pro Tip: Support the tube loosely in a gentle curve when you reconnect it. A sharp bend right at the fitting is a common spot for a slow leak to develop over time.
Friction-mounted gauges should snap back into their bracket without wiggling. If the gauge feels loose after reseating, check the bracket screws rather than forcing the tube to hold it in place, since tube strain is itself a common cause of disconnection later.

Some problems are not yours to fix. A cracked U-tube, fluid that looks cloudy or discolored, or a fitting that has broken off the housing are signs to stop and call for service or repair rather than attempt a workaround. Contaminated fluid in particular will throw off readings even after a correct re-zero.
What normal manometer readings look like and safe operating limits
Manometer readings vary by system design, pipe diameter, and fan model, so there is no single "correct" number that applies to every home. That said, homeowner guidance commonly cites a range around 0.5 to 1.75 inches of water column as typical operating vacuum for many residential systems, though your own system's normal range depends on its specific design.
A few things to keep in mind when comparing your reading to that range:
- The manometer measures suction in the vent pipe, not the radon level in your home's air; a radon test is the only way to confirm actual concentration.
- A reading far above your system's documented baseline can mean the fan is working harder than it should, often due to a partial blockage or ice in the exhaust.
- A reading far below baseline, or at zero with the fan audibly running, usually points to a disconnected tube, a leak, or a failing fan.
- Consistent day-to-day readings matter more than any single number, since they confirm the system is behaving the way it did when it was verified.
This is where labeling helps. ANSI/AARST mitigation standards call for systems with fans to include a continuous, viewable operating-range monitor, installed where it is easy to see and protected from damage, and labeled with the startup values recorded when the system was verified. When your installer has written those startup numbers on or near the gauge, checking your system becomes a simple side-by-side comparison instead of a guess. A reading that drifts noticeably from that labeled baseline, especially one that climbs well past it, is worth comparing against the fan's maximum rated pressure before assuming the system just needs a reset.
Troubleshooting checklist: tube, fluid, and mounting problems
Most manometer issues trace back to one of four causes, and checking them in order usually gets you to an answer in a few minutes.
- Loose or disconnected tube: reseat the vinyl tube fully on the fitting and watch for a steady height difference to return within a minute or two.
- Kinked or split tubing: a pinched tube restricts airflow to the gauge and produces a reading that looks lower than actual suction; replace cracked or brittle tubing rather than patching it.
- Dirty or contaminated fluid: cloudy, discolored, evaporated, or insect-contaminated fluid changes the reading and should be replaced rather than topped off.
- Outdoor mounting exposure: a gauge mounted outside is exposed to freezing temperatures, direct sun, and moisture, all of which degrade the fluid and fittings faster than indoor placement.
If the checklist does not explain what you are seeing, a couple of low-effort checks can narrow things down further. Listen near the fan housing (usually in the attic or outside on an exterior wall) for the steady hum that indicates it is running. You can also hold a tissue near the system's inlet pipe below the slab, where accessible, to feel for a slight pull of air.
If your manometer reading still looks abnormal after working through these steps, or if you are uncertain whether your home's radon level is actually under control, a short-term radon test is the most direct way to confirm what is actually happening in your indoor air, separate from what the gauge shows about the fan.
Mounting and maintenance that keep readings accurate
Where you mount the manometer affects how long it stays accurate and how easy it is to check. Indoor placement, typically in a basement or utility space where the vent pipe is visible, protects the fluid and fittings from temperature swings and sunlight while still keeping the gauge easy to glance at.
- Mount the gauge where it is visible during a normal walk-through, but out of the path of foot traffic or stored items that could bump it.
- Secure the vinyl tubing with a loose loop rather than a tight bend, and avoid letting it rest against sharp edges.
- If your installer provided startup values, write them directly on or next to the gauge so comparisons are quick.
- Do a monthly visual check: fluid should look clear, fittings should feel snug, and the reading should sit close to your labeled baseline.
Pro Tip: Keep a small note with the date and reading each time you check the gauge. A simple log on the wall near the unit makes it obvious when a reading has drifted, long before it becomes a bigger problem.
A gauge with clear fluid and a stable reading usually just needs an occasional re-zero. Replace the U-tube itself only when the fluid is visibly contaminated, the tube is cracked, or the markings have faded to the point of being unreadable. Routine inspection schedules like these are consistent with general guidance on homeowner maintenance plans for home mechanical systems, where small, regular checks catch problems before they require a service call.
When to call a radon professional for service or verification
Some signs mean it is time to stop troubleshooting and call for professional help:
- No height difference appears on the manometer even though you can hear or feel the fan running.
- The fluid will not settle level at zero when the gauge is open to room air on both sides.
- The U-tube is cracked, the fluid is contaminated, or a fitting has broken.
- You suspect the fan itself has failed, especially if it has run for several years without replacement.
- The system was recently disturbed by renovation, roofing, or other work near the vent pipe or fan location.
A professional visit for verification or repair typically includes confirming the gauge against its labeled startup values, running diagnostic checks on the fan and piping, and completing a post-repair verification test. That documentation matters beyond peace of mind: it is often requested during real estate transactions to confirm a mitigation system is functioning as designed. Our installations follow ANSI/AARST monitoring requirements, which call for a continuous, viewable gauge and documented baseline readings as part of a system's long-term operation and maintenance.
Why routine manometer checks matter for long-term radon control
A manometer is one of the lowest-effort safety habits a homeowner can build. It takes a few seconds to glance at, and it gives continuous visual confirmation that the fan is doing its job between the test dates you actually think about radon.
Where homeowner checks reach their limit is calibration, diagnosis, and documentation. A professional visit fills that gap: confirming the gauge against its original startup values, catching a fan that is wearing out before it fails outright, and producing the written record that real estate transactions often require.
Neither approach replaces the other. A homeowner glancing at the gauge each month and a professional verifying the system periodically work together to keep a mitigation system doing what it was installed to do.
— Yoshua
Getting professional support for testing, verification, or repair

When a manometer reading leaves you uncertain, or you would rather have a professional confirm everything is working, a professional team can provide radon testing, verification testing, mitigation system installation, and system repair and fan replacement services. A typical visit includes an on-site check of your current setup, confirmation of labeled startup values against your gauge, and post-service verification testing with written documentation.
We also handle:
- New construction rough-ins for radon systems during the building phase.
- Commercial and multi-family property mitigation.
- Radon testing and mitigation tied to home sale timelines.
If your gauge reading has you wondering whether your system needs attention, visit our services page to see what is involved and get a written quote for your home.
This article is general information, not a substitute for advice from a qualified doctor. Consult a qualified healthcare professional about your own circumstances before acting on anything here.
FAQ
What is a radon gas test kit?
A radon gas test kit is a device, either short-term or long-term, that measures radon concentration in indoor air, separate from what a manometer shows about fan suction. EPA guidance recommends testing homes and re-testing after a mitigation system is activated to confirm levels have dropped.
How do I hook up a radon manometer?
The manometer's vinyl tube connects to a barbed fitting on the radon vent pipe, usually already installed by your mitigation contractor. Once connected with the fan running, a height difference between the two fluid legs confirms the fan is operating and pulling suction through the pipe.
What pipe is used for radon mitigation?
Radon mitigation systems typically use rigid PVC pipe sized to the system's airflow needs, routed from beneath the slab or crawlspace up through the home to an exterior discharge point. Pipe routing and termination placement follow guidance similar to other exhaust venting principles, such as those covered in general roof ventilation discussions for stack termination clearances.
Can I do a radon mitigation system myself?
Design and installation require matching fan capacity, pipe sizing, and sealing details to your specific foundation type, which is why ANSI/AARST standards call for monitoring and labeled baseline values as part of a documented, verified installation. For an installation that includes post-installation verification testing and documentation, a professional mitigation service is the more reliable route.
Why does my radon manometer reading seem low?
A low reading often means the zero marker was set incorrectly, usually while the fan was still connected, which builds the fan's vacuum into the baseline. Re-zero the gauge with the fan off and the tube disconnected, then take a fresh reading once the fan is running again.
Sources
- How to Read a U-Tube Manometer
- ANSI/AARST RMS-MF 2018 (with addenda) — system monitors requirements
- EPA tech bulletin: activating a passive radon system
- How To Read Your Radon Mitigation System's Manometer - Metro Property Inspection